8/20/10

Watermelon Baby Buggy:)


Hi everyone. Thanks for stopping by again today!

I wanted to give a little shout out to all the lovely blogging ladies out there who are expecting a little one in their lives. I am having so much fun following your journey to motherhood. Thanks for sharing this special part of yourselves on your wonderful blogs!

I thought of you while making (and enjoying:)) this cute watermelon baby carriage:)

Here are some step-by-step photos to show you how easy it is to make a watermelon baby 'buggy':

1. Cut a thin slice off the bottom of your watermelon to stabilize it.

2. Mark off a horizontal line around the middle, and a vertical line slightly off center as shown. I was using a personal sized:) melon, so I used rubber bands, but you can score a guide line with a knife or pencil. The section on the top right is the part to be removed.

3. Starting at an intersection of your markings, make a horizontal cut around the circumference of the melon ending at the opposite intersecting mark, and then around the top as shown. I used a serrated "V" shaped knife. You can make a straight cut or scalloped edge.

4. Remove and reserve the cut section, part of this piece will be used for the handle.

5. Scoop out the watermelon. I made some melon balls, then scooped out the rest with a large spoon.

6. Cut a handle from the reserved piece of melon. I just eyeballed a "U" shaped piece from the middle. Remove the juicy red melon, leaving just the rind for the actual handle.

The knife is pointing to the part that became the handle.

7. Insert 2 toothpicks halfway into each end of the handle. Use about 3-4 inch wood skewers if you have a very large melon:)

Push the exposed ends of the picks vertically into the rind of the scooped out melon at the end for a handle as shown.

8. Attach 4 slices of orange and limes with toothpicks to the bottom as wheels for the carriage as shown. I covered the end of the toothpick with a raspberry hubcap:) Cut off the point of the toothpick inside the melon if it sticks out.

9. Fill the melon carriage with reserved melon balls and your favorite fruits! I was lazy and just used berries, tiny champagne grapes, fresh currants, and yellow husk cherries.

Wouldn't this be cute for a baby shower?

Or to bring over for a new mom:)

Becoming a mom is the best thing that ever happen to me, so seeing all of you really brings back many happy memories of my own feelings at the time I was expecting. It is such an awe inspiring, magical time. I never felt more beautiful then when I carried my beautiful babies, and I hope you do too:)

8/17/10

Raw Pantry Essentials


Stocking a raw food pantry may be a bit intimidating when you first start a raw food diet. When I first started eating raw, there were a few ingredients needed to keep on hand which allowed me to try hundreds of new raw food recipes.

Each raw pantry will be unique, tailored to your own individual tastes and dietary requirements. Of course, there was no need to run out and buy everything listed right away. I simply purchased a new ingredient as needed for recipes I was trying:) Many of the items were purchased in the bulk section of my co-op.

Here are some basic items you may find useful when starting your raw food adventure:)

Oils:

Olive, coconut, hemp, sunflower, grape seed, macadamia nut, sesame, pistachio, avocado, almond, and walnut. Although it is not raw, some raw recipes use toasted sesame oil, which tastes incredible:) Most oils should be kept in a cool, dark place. To retain the optimum flavor for an extended time, oils may be refrigerated. It is normal for oil that is refrigerated to become thick and cloudy. Cloudiness is not harmful and should disappear when the oil warms to room temperature. I have kept oils stored in glass bottles up to a year. If possible, look for oils that say raw, cold pressed and not deodorized.

Sweeteners:

Dates(can also be in sugar form, or liquid when blended with water), agave(somewhat controversial right now, also in powder form), stevia, yacon syrup, coconut or palm sugar, evaporated cane juice, coconut nectar, honey(not vegan), rapadura, xylitol(derived from birch trees) and lucuma powder. Maple sweeteners are sometimes used in raw food recipes even though it is not a raw food product and is available as a syrup(grade B) or granulated sugar. Except for maple syrup, I store sweeteners in tightly covered glass jars in a cool dark pantry for up to a year.

Nuts and seeds:

Walnuts, almonds, pecans, macadamia,pine nuts(pignoli), pistachio, Brazil, hazelnuts, cashews, sesame seeds, poppy seeds, chia seeds, hemp seeds, pumpkin seeds, sunflower seeds, flax seeds(brown or golden), quinoa, wild rice, buckwheat, and coconut:)

Seeds for sprouting:

May include seeds in the shell like sunflower, peas, alfalfa, broccoli, and spicy seeds like radish, mustard, or clover. Seeds and nuts should be stored tightly covered in glass jars in the refrigerator for up to 1 year. Nuts that have been soaked/sprouted and dehydrated can be stored on a cool dark pantry shelf for 1 year. Many raw foodies prefer to soak/sprout most nuts and seeds for optimal digestion. Please check out my favorite sprouting site, "Sproutpeople" for sprouting instructions.

Beans and Grains:

Most beans and grains are sprouted on a raw food diet. Sprouted grains are also nice dehydrated and ground into flour. Some grains are sprouted and used to make the drink called rejuvelac. Some popular grains include wheat berries, oats, rye, barley, triticale, spelt, kamut, millet and amaranth. Beans for sprouting are mung, lentils, adzuki, garbanzo(chickpeas) black turtle, and pinto.

Dried fruits:

If you have a dehydrator, you can make most of these from fresh produce:) Dried fruits should be organic when possible and free of sulfites or sweeteners like sugar. Raisins, currants, dates, figs, pineapple, mango, all berries(especially goji berries), cherries, apples, apricots, nectarines, papaya, tomato:), cranberries, gooseberries, pears, mulberries, peaches and plums(prunes). Store tightly covered in glass up 6-9 months for best flavor and freshness.

Sea vegetables:
Nori sheets, dulse, wakame, kombu, arame, kelp, kelp noodles, spirulina, chlorella, Irish moss, agar, hijiki, and sea spaghetti. Store tightly covered for 6 months for most nutritional value. Keep up to 1 year tightly covered.

Cacao products:

Cacao butter, cacao paste, cacao powder, cacao nibs, whole cacao beans. Many people enjoy the taste of carob, and use it in place of, or in conjunction with cacao powder. Store tightly covered in a cool, dark place for up to 1 year.

Herbs, spices, and flavoring:

Basil, oregano, parsley, cilantro, rosemary, curry, dill, cayenne, cinnamon, cardamom, cumin, sage, thyme, pepper, red pepper flakes, coriander, chipotles, chili, salt(I love pink salt), and paprika(sweet and smoked), culinary lavender and teas. There are so many more dried herbs, this is only a partial list, just pick the ones you like:) Dried herbs can be made easily by hanging bunches of fresh herbs upside-down until they are dried. Store tightly covered in pantry for up to 1 year for freshest flavor.

Nutritional yeast is a popular non-raw ingredient used in many raw recipes to impart a cheesy flavor.

Some raw food recipes may call for non-alcoholic extracts such as vanilla, cherry, almond, coffee, or maple. Extracts should keep well tightly covered in refrigerator after opening for 1 year. Fresh vanilla bean or vanilla powder is a wonderful option for true vanilla flavor. I also adore orange and rosewater.

Condiments:

Raw apple cider vinegar, raw coconut vinegar, Braggs liquid aminos, Nama Shoyu, Miso paste, ume plum vinegar, raw coconut aminos, and tamari.

Miscellaneous:

Some of these ingredients may fall into the "superfood" category. Lucuma powder(also used as a sweetener), maca powder, mesquite powder, acai powder, and green phytofood powders.

Of course, this is just a partial list of ingredients you may find helpful to have on hand while exploring a raw food diet. This post was created at the suggestion of fellow raw food blogger D2Quilter, from a comment on My Mostly Raw Pantry post:)

I hope you find some new things you may like to try, and let me know if I left anything out! I may make some ingredient additions and add more product links when I have more time:) If you need some recipe ideas, make sure to check out the happy raw kitchen blog RECIPE INDEX, and one of my favorite raw recipe sites, goneraw.com :)

It is fun to experiment with my pantry items, however, keep in mind the bulk of what I eat is fresh, organic fruits and vegetables, prepared simply.

My very own little fridge is usually jammin' with fresh fruits and veggies:) Yup, that means tons of smoothies and salads!


What are your favorite raw pantry essentials?

8/4/10

Kombucha, Baby! Update


Hey everyone!

First, thank you so much to everyone who commented on my last post, Raw Chocolate Lava Cake. Your comments were all so sweet...no wonder I love you all:)

Today's post is a quick update for those of you who may be interested in brewing your own kombucha. I have quickly learned how fascinating and fun this process is. I just LOVE it!

Check out my previous post where I actually grew my very own baby SCOBY from a bottle of commercial kombucha:)

My homegrown momma SCOBY was happy to reside in a brand new batch of tea. I used both green and black tea this time. The most fascinating thing to me is watching the ever changing brew, especially the interesting bubbles and yeast formations. This cluster looked like a tiny dancer to me...yeah, I have a vivid imagination:)

It was so exciting to see the bubble line between momma SCOBY and the beautiful new baby that formed on top:

After about 1 week I used a straw to taste the kombucha. Just dip the straw, and cover the top end with a finger, and release the sample in a shot glass.

It tasted wonderful to me and had lots of bubbles. Time to bottle this batch, and get a good look at the new baby!

The new baby SCOBY was well formed and even a bit larger than momma:)

I saved about a cup of this kombucha and separated the 2 SCOBYs for the next batch of brew.

The sparkly new kombucha was well sampled:) and bottled.


For bottling this time, I used re-cycled commercial kombucha bottles. A helpful tip to remove the old labels: use a hair dryer to warm the bottle and the sticker peels right off:) Any glue residue can be scrubbed off using a drop of oil and a homemade scrubbie:) The smaller jar was a spice jar filled with kombucha from my first brew...I called this my 'baby booch' :)

For the next batch of kombucha, I made a gallon of sweet tea to fill 2 half gallon jars, using both green and black tea again. Each new jar contained a SCOBY, and some reserved tea from the first batch. At first, Momma SCOBY went to the top of her jar, and baby went to the bottom of his:

After a few days, each started to form a new baby SCOBY on top:

The mature SCOBYs floated around a bit, and both were almost vertical while the new babies grew on top.

The newly bottled kombucha was also placed on the shelf for about 3 days for a 2nd ferment. Since the weather was still pretty warm, I was afraid to let it go too long at this stage since some people have written about the bottles exploding if left too long...yikes!

In another day or two, this new batch should be ready to bottle*. I am glad the weather cooled down a bit because it's been brewing too fast for me!

*New batch is delish!

And the latest brew is ready to go:)

I just had the last of my previously bottled kombucha and...

I'm not positive, but I think there was a tiny baby SCOBY in the bottle. EEK!!! Can any home booch brewers advise me about this. It was strained out since I noticed it before pouring:)

Next time about 2 gallons will be brewing, so I would also appreciate any tips on how to keep it from taking over the house:) Some day I'd love to get a system like Averie, check it out:) So awesome!

Well, I probably won't be posting much more than a quick update on kombucha from now on and get back to more raw food:) so...

Cheers everyone!

Have a wonderful day:)

7/29/10

Raw Chocolate Lava Cake :)


Hi everyone! Just a real quick post today, to tell you about an idea for a raw chocolate lava cake. For some reason, I came across several SAD versions of this cake today, so it made me wonder if there was a raw version.

A quick search for a raw chocolate lava cake recipe came up empty, so off to the happy raw kitchie I went:)

I don't have an exact recipe, but don't worry, you really don't need one! Just use your favorite raw brownie/cake/date-nut ball recipe! The filling pictured is the old stand-by, chocolate avocado pudding, but a raw chocolate sauce would be more authentic:) You will also need a small 1 cup bowl, and some cling film to shape the cake.

Here is how to assemble the cake:

1. Make your favorite raw brownie or cake recipe in the food processor. I made a basic recipe like my raw caramel brownie bites, using 2 cups of nuts, and one cup of dates with some cacao powder, vanilla and salt. This made more than enough for 2 small cakes, each in a 1 cup bowl.

2. Take a small handful of the brownie mixture, and press it out onto some parchment, about 1/2 inch thick, and cut out a circle using the small bowl as a cutter. Cut another circle if you are making two cakes.

3. Line the small bowls with cling film, and press the remaining brownie mixture evenly into the entire bowl, about 1/2 inch thick. There was a little left over mix, enough for about seven little brownie bite truffle balls:)

4. Fill with your favorite raw pudding, or chocolate sauce(equal parts cacao powder and liquid sweetener like agave, maple, or coconut syrup, and a pinch of salt).

I used the ingredients shown, plus a little water to loosen the pudding a bit. I had some filling leftover, too:)

5. Top with the cut-out cake circle, and press around the perimeter to seal in the filling. I found it helpful to pull the cling film in a little while pressing gently on the top of the cake edge.

That's it! All done:) They were chilled for a short time because I wasn't ready to eat them yet, but I bet they are real good warmed in the "D" for an hour. To un-mold, hold the bowl in a clean cloth wrung out in very hot water for a minute, and pull it out by the wrap. As you can imagine, they are quite rich...almost half was enough for me:)

I had some caramel sauce to squeeze onto the plate, too:) It was similar to this recipe, if you would like exact measurements:)

Love ya!

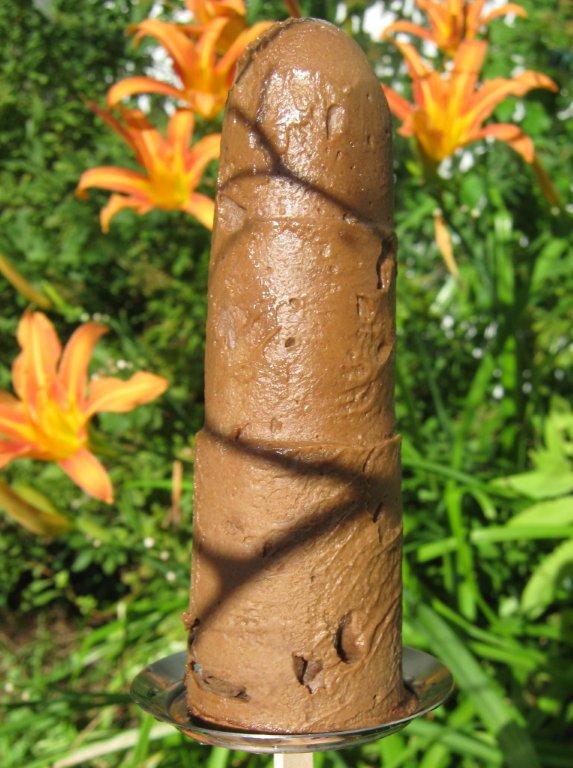
~ETA~ the extra filling made an awesome fudgesicle:

7/27/10

Keepin' My Cool :)


Welcome back everyone! Hope you are all staying cool. The Adirondack mountains have chilled out a bit lately, but it is still warm enough for one of my favorite raw treats, Popsicles!

They are so easy to create, and help keep you hydrated in the hot weather in a fun way.

The "recipe" is simple, just use your favorite liquid like fruit puree, juice, or smoothie (yup, even a green one). If you like fudgesicles, you can use your favorite avocado pudding, yum!

Even banana soft-serve is delish as a Popsicle. For the pops pictured, the white was 1 young Thai coconut, pureed with a splash of coconut water, a dash of coconut nectar, and a squeeze of lime. The yellow was sweet, juicy pineapple, and the red was dark, sweet cherries with a spoon of coconut nectar. Some flavors taste a bit less sweet to me when frozen, but you can omit all sweeteners if you prefer:)

My favorite flavors in this pop were the pineapple and cherry:)

Check out this very cool stainless steel ONYX Popsicle Mold from the tickle Trunk. I absolutely adore it!

The mold is so well made, I think it could become a family heirloom!

One great feature is that the pops can be made one at a time, the perfect thing to make with that little extra smoothie that won't fit in the glass. Frozen pops can be removed as soon as they are solid, and new treats can be made since you need to use a new stick each time. The company is actually working on re-usable bamboo sticks! In the meantime they do come with extra sticks, and you can find replacements if needed.
The tops have a colorful silicone seal around the stick, and they give you an extra set, too. I found it easier to insert the stick from the underside of the top, so the seal doesn't pop out.


I will be reusing the 'spent' sticks myself in a crafty trivet or something :)

I stored a few Popsicles (removed from molds) in the freezer, wrapped in parchment paper:

I even made some like my bloggie friend, bitt, who used sweetened tea. Mine were double strength mint tea, sweetened with coconut nectar. Yum!!! The orange pops are persimmon...absolutely fantastic! The nice ripe persimmons got a little smushed on the way home from the market this weekend, so into the Popsicle they went! I still have an older plastic mold, so I used that for this batch.


They were all so cool and refreshing, but the mint was especially nice.

If it is hot where you live, I would love to hear about your ways of staying cool!

For those interested, I should be back soon with a kombucha update since momma SCOBY has given birth haha!!!

I would also like to thank the lovely Pure2Raw twins, Michelle and Lori, for featuring a few of my socca pictures on their blog earlier this week in a feature called "Socca Sunday"! Although it is not raw, I am totally in love with it! Thanks so much, Michelle and Lori:)
Related Posts with Thumbnails