7/9/10

Making Raw Nut Butter


Hi everyone! Another busy week has flown by for me...hope you are all staying well and happy:)

This week has been a scorcher in the Adirondacks. How hot has it been? Just look!

I actually have not been on the computer much because it is in the direct flow of the air conditioner!!! I am very grateful to have one in this heat, but... {{{BRRRRRRRR}}}...Once in a while I have to go outside for a few minutes and warm up.

To my blogging buddies: I hope to catch up on some much missed blog reading very soon:)

While I was staying cool inside, it was the perfect time to experiment with new recipes, and prepare some raw staples like nut butter.

The following pictures are of making raw almond butter, but any nuts, seeds, or even shredded coconut(for homemade coconut butter, of course!) can be used. One of my favorites is a "rawtella", using hazelnuts, cacao powder and coconut sugar :)

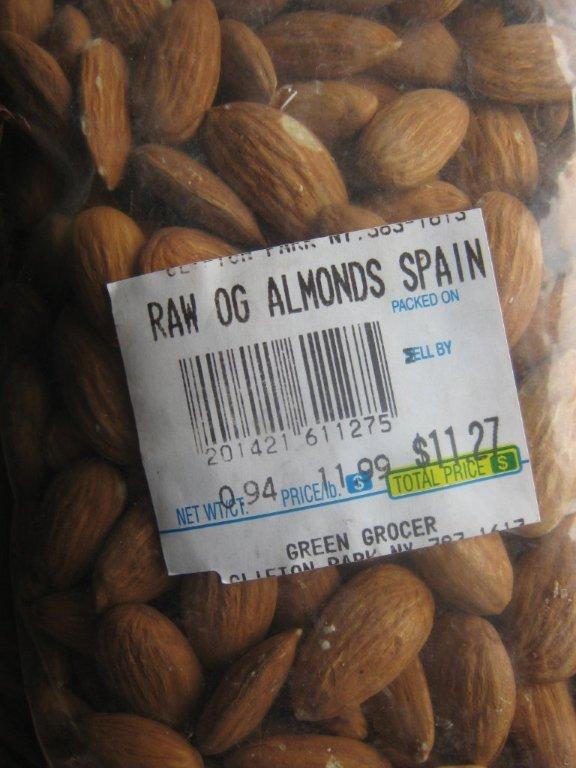
Every once in a while, I treat myself to raw almonds from Spain, but not today:)

I used organic almonds from the bulk bins at the co-op.


Here are some step-by-step pictures of making raw nut butters:

1. Soak your nuts:) Tip: Only soak them if you can dehydrate them!

Haha...the camera fogged up going from the air conditioned house to the heat outside! This was about 4 cups of almonds. For my size processor bowl(11 cups) four cups is the least amount that will blend properly.

It is up to you if you want to soak your nuts/seeds. If using dry, un-soaked nuts, you should be able to omit the oil, and it may take a bit longer.

~ETA~ For best results, use DRY nuts, either soaked and dehydrated, or un-soaked.
Wet nuts, or trying to add water instead of oil gives a pasty, rather than creamy result, and the nut butter will spoil quicker.


After soaking about 8 hours, almonds may be peeled by "popping" them out of their skins. Just pinch them between your thumb and first finger. The butter will be light in color, and taste a bit different if you peel them.

2. Dehydrate your nuts or seeds if you soaked them about 8-12 hours or more depending on nuts used:

3. Place your nuts in a food processor fitted with the "S" blade.

Tip: Process just until crumbs form to make nut flour used for recipes:)

Nuts will begin to stick to the sides of the container and you may need to stop and scrape the sides.

4. Add a tablespoon of oil, and continue processing. I like to use the matching oil, but any neutral, light oil will work. The natural oils in the nuts will start breaking down as well, so I always start with 1 tablespoon of oil. You can also add a little salt to taste if desired. It is also good with a touch of sweetener, or even cacao powder for a treat.

Soon a ball will form, and you can use it like this in recipes like nut butter cups:)

Continue processing and add a bit more oil if needed. All nuts are different, so I like to add the oil 1 tablespoon at a time (usually 3T, no more than 4T) until a smooth, creamy butter forms.

It does get warm, but not too warm:)

That's it! Homemade raw nut butter in about 12 minutes, not counting the soaking or the dehydrating time haha:) You may have to let it go a bit longer, depending on your processor. It will keep for several weeks in a glass jar in the fridge. And remember, you can make a quick nut milk by blending about a tablespoonful of nut butter with a cup of water:)

Until a few years ago, I would never have thought of making my own nut butters, but now I love it! Have you ever made your own nut butters? What is your favorite?

Well, my hands are freeezzzing now...lol! Thanks so much for dropping by today and I hope you all have a great weekend!

ETA~ Click here for making nut butter in a Vitamix:)

7/2/10

Things That Made Me Go Mmmm....

Today I thought it would be fun to share pictures of some of the yummy raw food I have been enjoying this week.

I just love to try new recipes, and read food blogs so here is just a small sample of incredible meals inspired by my lovely blogging buddies:)

This has become a weekly favorite for me. I just can't get enough:) Thank you, Marlie for posting about your Avocado Truffles!


I whipped up some raw fresh peach ice cream and topped it with a few raspberries and Walnut Coconut/Crumble from Noelle of An Opera Singer in the Kitchen blog. This one had me singing in the kitchen...hehe!


I had this cool and refreshing thick shake a couple of times...a quickie version of Raspberry Banana Almond butter & Cinnamon Smoothie by Sarahfae of the Addicted to Veggies blog I just used 3 frozen bananas with a handful of raspberries and a dash of cinnamon and a splash of water. Thanks for the lovely inspiration:)


I can never have enough raw salad dressings...especially thick, rich, creamy..mmmm:)....I filled an avocado with the dressing and sprinkled it with some eggplant bacon, cut cherry tomatoes and tiny raw rosemary crackers. Thanks to Jackie from the blog Peaces of Earth for posting her Ranch Dressing:)


It was the perfect dip for cucumber cut with a french fry cutter.


Black Forrest Banana Soft-Serve...yet another way to enjoy this quick and easy favorite:) Thanks so much Lisa from the blog Vegan Cookbook Critic!

Thanks so much to everyone who has a blog for posting your lovely food creations. You are all so beautiful and inspiring, and I appreciate all of you! {{{HUGS}}}

6/30/10

Watermelon Basket


Hi everyone! Hope you are all enjoying the summer so far (if it is summer where you are!) Our summers are short and sweet here in the beautiful Adirondack Mountains of New York, so I have been enjoying it while it lasts!

Thank you all so much for the great response to my last post, Raw Sprouted Bagels. They hit the spot for me when I am craving something "bready" :)

In today's post, I would like to share with you one of my favorite summertime treats, a watermelon basket. It is the perfect thing to bring to a party, BBQ, or potluck. It is naturally raw, and vegan!

Here are some step-by-step pictures to show you how easy it is to create this lovely basket:)

1.) Pick a melon that has a nice shape, and will sit flat. You can remove a sliver off the bottom to level it if needed.

2.) Make two parallel cuts in the center of the melon about 1 1/2 inches apart, going about halfway down the melon. The melon between the cuts will form the handle of the basket.

3.) Starting on either side of the handle, make a horizontal cut around the melon to the other side of the handle cut.

Be careful not to cut through the handle part. I had a "V" shaped knife, but a straight knife will work as well. You can make a scallop or zig-zag edge, or just leave it straight. If you have a serrated cutter used for pumpkins at Halloween, it works well for watermelon:)

4.) Repeat the cut on the other side of the handle, removing both cut-outs.

5.) Cut the melon around the inside of the handle,

and remove the juicy melon.

6.) Scoop out the melon. I used a large serving spoon.

My mini melon was thin skinned, so I left a little flesh to keep it sturdy. Larger melons can be scraped closer to the green part.

7.) Cut up the removed watermelon and mix it with your favorite fruits. If you follow food combining rules, just use other melons, like cantaloupe or honeydew.

8.) Fill the empty watermelon basket with the fresh fruit mixture. Depending on the amount of other fruit, you should have enough to fill the basket two times. Skewered fruit can be used if you prefer, and looks really pretty. I added some little flag toothpicks, for the upcoming Fourth of July holiday:)


Here is a picture of a straight cut basket:


If you would like a few more ideas for the upcoming weekend, please check out my Fourth of July post from last year,

or my Memorial Day post for more watermelon ideas:)


Thanks so much for stopping by my happy raw kitchen today, and I hope you all have a very happy and safe weekend!

6/18/10

Raw Sprouted Bagels :)


Whoa baby...is it Friday already? Time really does fly when you're havin' fun:)

I have been spending lots of time outside, enjoying the sun(finally) and of course playing in my happy raw kitchie!

Thank you all for the wonderful comments on my last post, Real Cream Cheese. Of course the real credit goes to Poemomm for creating the recipes and posting them for everyone to enjoy:)

I appreciate everyone who wished me well about my computer problems. A few hours after I complained...I mean mentioned it in my post, my hubby came home with a shopping bag with a road runner on it. Beep, Beep!! What a great surprise:) He hooked me up with a new internet connection. He said something about me suffering long enough...lol! Actually I think it was because he needed to use the computer the other night and realized how terrible the dial-up connection was:)

I was finally able to watch some of the videos I have always just scrolled past. I got a chance to see how cute you all are:) I remembered a video I really wished I could see a few days earlier by amazing raw Chef Russell James. Although his cheese in the video totally blew me away, I used his suggestions to make a little cheese plate of my own.

Thank you Russell, my mouth was very happy!

So, back to the topic of this post...Raw Bagels

After making the lovely cream cheese earlier in the week, my thoughts immediately went to wishing for a bagel to go with it. You can use any thick bread recipe you like to make bagels, but I had a jar of sprouted soft white wheat on hand so I used a simple Essene dough. I added a drizzle of agave and olive oil with a pinch of salt to taste. The amount of wheat I had made 8 mini-bagels:)

Here are a few pictures to show how simple it is to shape a raw bagel:

Process sprouted wheat with agave, oil and salt until a ball forms. Remove from processor and knead the dough by hand for a minute if needed.

Shape dough into a round, and cut into 8 pie shaped pieces

Roll each segment into a ball

Flatten each ball slightly and poke a hole in the middle, use a spoon handle, dowel, or clean finger:)

Place on mesh sheets to dry, and brush with water and sprinkle with desired toppings. Dry at 112 degrees for about 6-8 hours until the outside is crisp and dry and inside is slightly moist. I like to make small bagels so the inside is less likely to sour. Also, I get to eat two or three if they are little!

Since the cream cheese was only a sweet memory by the time I made the bagels, I enjoyed them as a BLT.

So good!

I also made a 2-bite bagel with sprouted rye topped with caraway seeds:)

Click here to see an earlier post about Essene bread:)

Well, the sun is calling to me again...have a great weekend everyone, especially all you wonderful fathers out there!

6/14/10

Real Cream Cheese


Happy Monday everyone! I hope you are all doing well today.

Some of my blogging friends may have noticed my recent absence from commenting on your blogs. I had to step away from the computer several times lately because my computer is loading reallllllllly slooooowww.

It takes almost half an hour to load many blogs and even after waiting I sometimes cannot comment, or the comment disappears! Until I can figure out what to do about this situation, I hope you will forgive my lack of comments. I still love you all, and am trying to keep up with you even though Google reader no longer updates for me either:) Is anyone else having these problems, or am I the lucky one? :)

Looking on the bright side, I am grateful that I can still post on my blog. And, I now have more time to have fun in the kitchie!

A recent recipe I enjoyed was Poemomm's Real Cream Cheese.

I noticed it was posted on Raw Freedom Community, and it is also on Gone Raw. This is a very easy, fermented nut cheese. I made about half the recipe, using 2 cups of macadamia nuts, approx. 1 cup of water, and 4 gelcaps of probiotic powder(approx 1/2 a teaspoon of powder measured).

*Since goneraw.com has sadly become undependable I am posting the recipe for cream cheese:
 

Here are a few pics of making the cheese, the method is about the same with any fermented nut cheese:

Blended nuts, water and probiotic

Scoop out into cheesecloth or large paint strainer bag (double thickness).

Squeeze cloth tight(do this over the sink...hehe)

Place wrapped cheese into a strainer placed in a bowl to catch whey drips

I used a small open spring-form pan ring with the base on top to press evenly. The weight is a jar of coins.

At this point, I wait a day or two for the nut cheese to ferment. After it is done to taste, I put the unwrapped nut cheese back into a small spring-form to shape it and refrigerate for a day until firm. Sometimes I like to add herbs, salt or spices at this point to mix it up a little. I just love this raw cheese! Thanks to Poemomm for posting this wonderful recipe!

I also made Poemomm's Basic Brown Bread.

**Link may not work, so I am now posting the bread recipe :

 
 I used a crust cutter to shape the slices. Click here if you would like to see my step by step raw bread making tips:)

It was perfect for making cream cheese and jelly sandwiches.

I always loved cream cheese and jelly, and I was so happy to find a healthy raw version. Next time I will try Poemomm's version with cherries as the jelly....yummmm! Thank you Poemomm! The bread is fantastic!

Have you ever tried cream cheese and jelly?


Here is a simple jelly recipe:

1 cup fresh fruit
1/2 cup pitted dates

note: I have made this with equal parts fruit and dates, depending on the sweetness of the fruit.

Blend together until smooth, store in refrigerator several days in a covered jar. This makes a sweet jam that kids just love! Of course you can try blending any other fresh fruit, or any soaked dried fruit (and water if needed) for different flavors. I really love goji jam:)

While there was still some cream cheese left, I filled some mini sweet peppers and a few jalapeno peppers with it and topped it with some eggplant bacon.

I always seem to have plenty of that eggplant bacon around:)

I also mixed in some garlic and herbs to make a boursin flavored cheese. This made one of the best poppers ever!

Hmmmm...with Father's Day coming up, maybe you can make some poppers for poppa:)
Related Posts with Thumbnails