Showing posts with label fruit. Show all posts

7/27/10

Keepin' My Cool :)


Welcome back everyone! Hope you are all staying cool. The Adirondack mountains have chilled out a bit lately, but it is still warm enough for one of my favorite raw treats, Popsicles!

They are so easy to create, and help keep you hydrated in the hot weather in a fun way.

The "recipe" is simple, just use your favorite liquid like fruit puree, juice, or smoothie (yup, even a green one). If you like fudgesicles, you can use your favorite avocado pudding, yum!

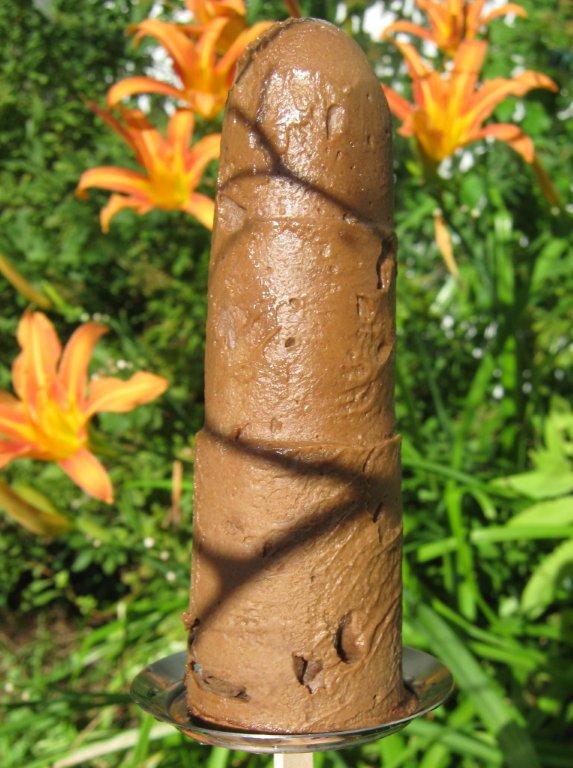
Even banana soft-serve is delish as a Popsicle. For the pops pictured, the white was 1 young Thai coconut, pureed with a splash of coconut water, a dash of coconut nectar, and a squeeze of lime. The yellow was sweet, juicy pineapple, and the red was dark, sweet cherries with a spoon of coconut nectar. Some flavors taste a bit less sweet to me when frozen, but you can omit all sweeteners if you prefer:)

My favorite flavors in this pop were the pineapple and cherry:)

Check out this very cool stainless steel ONYX Popsicle Mold from the tickle Trunk. I absolutely adore it!

The mold is so well made, I think it could become a family heirloom!

One great feature is that the pops can be made one at a time, the perfect thing to make with that little extra smoothie that won't fit in the glass. Frozen pops can be removed as soon as they are solid, and new treats can be made since you need to use a new stick each time. The company is actually working on re-usable bamboo sticks! In the meantime they do come with extra sticks, and you can find replacements if needed.
The tops have a colorful silicone seal around the stick, and they give you an extra set, too. I found it easier to insert the stick from the underside of the top, so the seal doesn't pop out.


I will be reusing the 'spent' sticks myself in a crafty trivet or something :)

I stored a few Popsicles (removed from molds) in the freezer, wrapped in parchment paper:

I even made some like my bloggie friend, bitt, who used sweetened tea. Mine were double strength mint tea, sweetened with coconut nectar. Yum!!! The orange pops are persimmon...absolutely fantastic! The nice ripe persimmons got a little smushed on the way home from the market this weekend, so into the Popsicle they went! I still have an older plastic mold, so I used that for this batch.


They were all so cool and refreshing, but the mint was especially nice.

If it is hot where you live, I would love to hear about your ways of staying cool!

For those interested, I should be back soon with a kombucha update since momma SCOBY has given birth haha!!!

I would also like to thank the lovely Pure2Raw twins, Michelle and Lori, for featuring a few of my socca pictures on their blog earlier this week in a feature called "Socca Sunday"! Although it is not raw, I am totally in love with it! Thanks so much, Michelle and Lori:)

6/30/10

Watermelon Basket


Hi everyone! Hope you are all enjoying the summer so far (if it is summer where you are!) Our summers are short and sweet here in the beautiful Adirondack Mountains of New York, so I have been enjoying it while it lasts!

Thank you all so much for the great response to my last post, Raw Sprouted Bagels. They hit the spot for me when I am craving something "bready" :)

In today's post, I would like to share with you one of my favorite summertime treats, a watermelon basket. It is the perfect thing to bring to a party, BBQ, or potluck. It is naturally raw, and vegan!

Here are some step-by-step pictures to show you how easy it is to create this lovely basket:)

1.) Pick a melon that has a nice shape, and will sit flat. You can remove a sliver off the bottom to level it if needed.

2.) Make two parallel cuts in the center of the melon about 1 1/2 inches apart, going about halfway down the melon. The melon between the cuts will form the handle of the basket.

3.) Starting on either side of the handle, make a horizontal cut around the melon to the other side of the handle cut.

Be careful not to cut through the handle part. I had a "V" shaped knife, but a straight knife will work as well. You can make a scallop or zig-zag edge, or just leave it straight. If you have a serrated cutter used for pumpkins at Halloween, it works well for watermelon:)

4.) Repeat the cut on the other side of the handle, removing both cut-outs.

5.) Cut the melon around the inside of the handle,

and remove the juicy melon.

6.) Scoop out the melon. I used a large serving spoon.

My mini melon was thin skinned, so I left a little flesh to keep it sturdy. Larger melons can be scraped closer to the green part.

7.) Cut up the removed watermelon and mix it with your favorite fruits. If you follow food combining rules, just use other melons, like cantaloupe or honeydew.

8.) Fill the empty watermelon basket with the fresh fruit mixture. Depending on the amount of other fruit, you should have enough to fill the basket two times. Skewered fruit can be used if you prefer, and looks really pretty. I added some little flag toothpicks, for the upcoming Fourth of July holiday:)


Here is a picture of a straight cut basket:


If you would like a few more ideas for the upcoming weekend, please check out my Fourth of July post from last year,

or my Memorial Day post for more watermelon ideas:)


Thanks so much for stopping by my happy raw kitchen today, and I hope you all have a very happy and safe weekend!

2/11/10

Sweet Heart Breakfast:)


Most mornings, my favorite breakfast is simply some fresh fruit.

Since I am still in a romantic mood for Valentine's Day on Sunday, I thought I would make a sweet but special fruit plate.

In a perfect world, this would be brought to me in bed...haha!

So easy even a child could make this...

1. Cut a heart shape out from the center of a nice juicy slice of cantaloupe. I had heart shaped cutters, but it can be done with a knife.

2. Fill with assorted berries or fruit, some may be cut into heart shapes:)

3. Garnish plate with whole strawberries and mint if desired.

The top picture shows a recycled paper heart that I will be using to decorate a card. Click here to see how it was made:)

Hope you get a chance to make this sweet valentine breakfast, or better yet, receive it!!!

11/20/09

CranBanApple Parfait


~Please note: recipe links within this post are broken but the video of Mike making it is still up.
Sorry for any inconvenience, and please let me know of any other broken links and I will do my best to find the recipe for you.

ETA~ some people are having trouble with the video, so I am copying and pasting the recipe from Mike:
Ingredients
2-3 sweet apples (fuji or honey crisp)
1 1/2 cups of cranberries
1/2 cup of soaked raisins
Dash of cinnamon
2 really ripe bananas
1 pear
1 1/2 heaping teaspoons of lucuma powder
Teaspoon of vanilla
2 tablespoons of coconut oil
4-6 soaked dates and soak water
Sprinkle of cacao nibs

Approximate serving size
2-3 servings

Machine use
Vita-Mix or Food Processor

Directions
If you make this advance, let each layer sit in their own bowls to settle for an hour or so. This will enhance the flavors and consistency of the dish. If you assemble right away, it will be a bit more runny.

Cut up apples and add to Vita-Mix or Food Processor with handful of raisins, 1 cup of cranberries and cinnamon.

Pulse down into a puree.

If it's too liquid, strain off some of the juice and enjoy it on the side.

Add this layer to your serving dish and press down to pack it in.

Rinse out Vita-Mix or Food Processor before moving onto the next step.

Put bananas, pears, vanilla and lucuma powder in Vita-Mix or Food Processor and blend down until smooth. Add warm water as needed.

Pour this layer on top and swirl dish to settle the banana mixture.

Rinse out Vita-Mix or Food Processor before moving onto the next step.

Add coconut oil, rest of cranberries, dates and 1/4 cup of the date soak water to the Vita-Mix or Food Processor. Blend down until smooth.

Place this layer on top and swirl the dish to settle the layer

Sprinkle cacao nibs on top.

Fall is the season for the healthy cranberry. I love cranberries in everything from juice to stuffing, and especially desserts:)

I am so happy that I found this wonderful recipe from Mike Lieberman, aka CanarsieBK of Simply Raw Recipes.

Earlier this month, Mike placed second with his recipe in VeggieConquest III: Battle Cranberry. VeggieConquest is an amateur vegan cooking competition that’s held in NYC. Click here to read more about it:)

I loved this recipe for many reasons, but mostly because it is delicious. It is so quick and easy. The components took me about 15 minutes to make. For those of you who like a lighter, nut-free treat, you will love this!

Please click here for the recipe for CranBanApple Parfait


The first layer is a combination of cranberries, apple(I used honeycrisp), raisins, and cinnamon.

The second, and my personal favorite, is a blend of pear(I had a very juicy Bartlett), banana, vanilla, and lucuma powder. I really loved this layer, and topped some leftover pudding with cacao nibs:) I think this will become a regular treat for me:)

The final layer is cranberries, coconut oil and dates. This layer appears a little lighter in color after it is chilled. Because of the coconut oil, it firms up a bit when cold.

It would be so nice to serve this in beautiful champagne flutes for an elegant dessert or first course for the upcoming holidays.

Click here for all my links posted for raw Thanksgiving recipes.


Thank you so much to Mike for this awesome recipe:) I really loved it!

ETA~As soon as I tasted it, I knew the banana layer would have to become banana soft serve:)

4 frozen bananas
1 Bartlett pear
1 heaping tablespoon lucuma powder
1 teaspoon vanilla

Process all ingredients in food processor fitted with the "S" blade until soft, light, and creamy. This may take a few minutes, and you might have to scrape the bowl once or twice. I really love my chocolate almond soft serve, but this is a close 2nd!

Fold in a scant 1/4 cup cacao nibs, if desired:)...I desired, lol!

I put the mixture in the freezer for a few hours, and it was still soft yet scoop-able.

11/17/09

Sweet Lil' Turkey

After making The Juiciest Turkey Ever:), I thought it would be nice to have a smaller version. This can be a little snack, or a decorative cake or brownie topper.


Each turkey tail is made with 2 slices of apple, one is cut with a round scalloped circle cutter, the other with a daisy fondant cutter. It is decorated with goji berries and pumpkin seeds.

The orange is a slice of (my very first!) persimmon, cut with a flower fondant cutter.

The body is 1/2 a dried fig, with sesame seed eyes, a sunflower seed beak, and 1/2 a goji berry waddle.

It looks cute on top of a cake, making it special for Thanksgiving.

The cake is inspired by this lovely cake by Susan Powers of Rawmazing. I added my cinnamon glazed pecans in place of cranberries:)

This is a version of the turkey made with dried fruit. I topped a breakfast cookie pop , but a round brownie, or your favorite cookie would make a nice base, or just enjoy it "as is". The dried fruit was added after the pops were dehydrated. A gentle press makes everything stick to the pop. If your fruit is very dry, you can mist it with a bit of water to make it sticky.

This one is made with pineapple for the tail, with a fig body decorated as above, and pecans, berries, and feathers cut from dried mango to decorate the tail. A smaller one would be cute on cupcakes:)

Cinnamon Glazed Pecans:)

Ingredients:
½ cup coconut oil
2 tablespoons agave, or maple syrup:)
1 teaspoon cinnamon
2 cups pecans

Preparation:
1. Prepare small cookie sheet by lining it with with waxed paper, parchment, or plastic wrap. Place in freezer.

2. Gently melt coconut oil in a bowl placed in another bowl of warmed water.

3. Add agave and cinnamon and mix well.

4. Add pecans (or nut of choice, raisins, coconut etc…) and stir.

5. Spread onto frozen cookie sheet and freeze till coating is hard.

Best if stored in freezer or fridge.

These are great by themselves or chopped up on bananas, ice cream, or oatmeal, all raw, of course!

11/12/09

The Juiciest Turkey Ever!


This really is the juiciest turkey I ever ate:)

For breakfast today I enjoyed a fruit arrangement in the shape of a turkey. This is another really easy idea for a raw vegan turkey:)

I started with the tail by laying out 9 pieces of banana, sliced on the diagonal. Each slice was topped with a clementine segment.

Next I made 8 grape and berry skewers. I actually threaded the berries and grapes on lollipop sticks. They were the perfect size and I prefer using them to sharp wood skewers when making them for children. I nestled them between the clementine slices.

The body of the turkey is half of a pear, with currant eyes and a beak cut from a slice of dried mango. The waddle is a goji berry, and the feet are cut from the mango using kitchen shears.

This could be a colorful, sweet, raw vegan addition to your Thanksgiving table.

If you are looking for a more traditional faux turkey, there are quite a few vegan options.

You have probably heard of Tofurky

Here is a Celebration Roast which was recommended to me by Joyce of Beautiful Living Food. Thanks Joyce!

Google for more options:)

There are also many links in my first Thanksgiving post for raw vegan Thanksgiving recipes. Many are for making your own turkey-like substitute.

Here is something you can do to actually save a turkey instead of serving one this year!

BTW~I noticed today was called Thankful Thursday.

The holiday season always makes me think more about what I am thankful for anyway:)

I could list everything I appreciate, but the list would be too long, as I realize I am thankful for just about everything in my life, especially my family.

But, if I had to pick one thing I am grateful for it would be my mother.

My beautiful Mom taught me so many things.

She taught me how important my health is, and that all the money in the world wouldn't make you happy if your health was bad.

She taught me by example how satisfying it is to be honest, giving, and loving.

She instilled a love of nature in me that is still so strong, especially in my decision to be vegan. She planted a tree when I was born:)

She showed me that real, true beauty comes from your heart.

She also showed me that you can hang a pair of cherries over your ears like earrings:)!!

She showed me the meaning of unconditional love, and by doing so enabled me to give it to my own children.

She gave me a childhood filled with hugs, laughter, fruit, play-doh, and her singing:)

My Mom has such a joy for life, and I appreciate that she instilled that joy in me.

She always let me 'be myself'. I am grateful that I wake up each day happy, and with a smile because of that:)

Most of all, she taught me how to appreciate each and every wonderful day, never to take anything for granted, appreciate the little things in life, and to live my life so I never have any regrets.

Thank you Mom, you gave me the best gift I have ever received...you.

9/9/09

Another Cute Ssssssnack:)

Here is another very quick and easy snack your little ones might like. This one might appeal more to the boys however:)

Snackie the Snake

Ingredients:
1 banana per snack
3 tablespoons almond butter, or nut butter of choice
1/2 teaspoon agave or honey
1/2 teaspoon ground cinnamon
1 small slice dried papaya, or any fruit leather you may have
2 currants, or 1 cut in half

1. Slice peeled banana into about 12 slices.

2. Mix nut butter with agave and cinnamon.

3. Spread a small amount of nut butter mixture between each slice, and re-assemble on plate in a slight wavy pattern.

4. Add currants for eyes.

5. Add sliver of papaya for tongue, cut as desired.

Best if prepared right before serving, or sprinkle with a little orange juice to prevent browning.

9/8/09

Sweet Strawberry Mice!

Here is a quick and easy treat for your little ones:) A cute back-to-school or after school snack!

Strawberry Mice

Ingredients per "mouse":
1 strawberry, remove hull, trim bottom to make it sit as desired.
2 pieces sliced almond
2 currants, cut in half, 3 halves are needed per mouse
1 thin strip dried papaya
toothpick for applying eyes and tail:)

1. Stick almond slices in strawberry for ears as shown.

2. Add cut currants for eyes and nose, cut side should be sticky, stick on using toothpick.

3. Insert papaya for tail as shown, making hole with toothpick if needed.

For "Cheese"
1 apple or pear makes several wedges

apple or pear, peel and remove core
lemon juice to prevent browning
drinking straw

1. Cut apple or pear into wedges

2. Push straw through wedges of apple or pear to look like swiss cheese:)

3. Sprinkle with lemon juice

Check out what happened to my sweet mice on Halloween!

4/29/09

Raw Food For Children

I hope your little ones will enjoy some of my unique raw recipes created especially for them!

Fun Fries


Ingredients:
for fries:
apple, pear, or mango cut into fry shapes (to prevent browning, sprinkle with lemon juice, and optional cinnamon,nutmeg,date sugar)
for goji ketchup:
½ cup dates, pitted
¼ cup goji berries
¼ cup water

Preparation:
1.Soak dates and berries in water for at least 1/2 an hour to soften.

2.Blend until smooth,may need additional water if dates aren’t juicy.

Serve as ketchup with fruit fries.

Play around with the jam by mixing other dried fruit with the dates or sub. fresh berries for the dried ones and water.

Ladybugs on a Log


Ingredients:
1 stalk celery
1 tablespoon almond butter
5 dried goji berries, soaked for 1 hour
1 sprinkle chia seeds,pictured, or poppy or black sesame seed

Preparation:
1. Wash and dry celery.

2. Fill with almond butter.

3. Sprinkle berries with seeds, and place across almond butter.

A variation:
ladybugs on a "raft"
Top sliced apple,pear,banana the same way.
Sprinkle the fruit slices with lemon or orange juice if making ahead (to slow browning)
Sprinkle with cinnamon, optional before adding the "ladies"!

fruit fiends


Ingredients: 
1 apple, cored and quartered
assorted nuts and seeds
nut butter
berries,grapes,or small fruit like kiwi berries
frilled toothpicks
orange juice

Preparation: 
1. Carefully remove football shaped slice from apple quarter, reserve for tongue.

2. Sprinkle all cut surfaces with orange juice.

3. Fill with nut butter ,if desired.

4. Add nuts or seeds as teeth, tongue is cut from removed apple piece(stick in with a bit of nut butter)

5. Add eyes with toothpicks using berries or grapes

If possible, let the little ones help to make these goodies. The best way to get children to eat healthy food is to get them excited and inspired about it. Children are more likely to eat foods they helped prepare:)
Related Posts with Thumbnails